Lately I have been so busy between working and school with a little bit of
everything thrown in between. Who knew that would be my inspiration? I told
myself that when I started this blog I would be committed to it, and stay
passionate about it. But Like any person you have your busy days, bad days and
good days. Which is what is what inspired my writers block to do an everyday
routine/makeup look. It’s just something simple that I know works with my daily
schedule. Some days I might do a little bit more or a little less depending on
how busy my day is. I personally like the natural and nude colors for my
everyday look but by no means do you have to. Do your thing girl! Well that’s enough
of my busy life intro/rant let’s get to the make up!
Skin
care: My morning skin care routine is a super simple because honestly I am not
a morning person and I need a quick and easy. When I lived in Ireland I loved
the “Simple” skin care line and when I came home I stopped using it for a while
switched back to it because I just loved their products so much. I use the “Smoothing
facial scrub” and you can find the “Simple” products at most drug stores like
CVS, Walgreens etc. Or even Wal-Mart. For moisturizer I am using the “Merle Norman
Brilliant –C moisturizer”. If you are looking for a different option I recommend
the “Simple” moisturizers.
Primer: You
can see in my previous post I am still using the “Smashbox photo finish primer”
in “Light” because it’s oil-free. All I use is a pea sized drop and blend it
all over with my ring fingers, a little goes a long with this primer so remember
you don’t need much and this will last a long time.
Concealer: For concealer I am using the “NYX HD Concealer”
in the shade “CW 02 Fair” for my under eyes. This shade is lighter than my
natural skin tone but I like to go a bit lighter for my under eyes because a
lighter shade high lights. When I apply the concealer I put the concealer under
my eyes in an upside down triangle shape, you want to highlight the
points where light is naturally drawn to your face. Like the middle area of your
fore head and cupids bow of your upper lip, I also apply this to those areas. I
actually haven’t used this concealer that long but I love it! Doesn’t crease
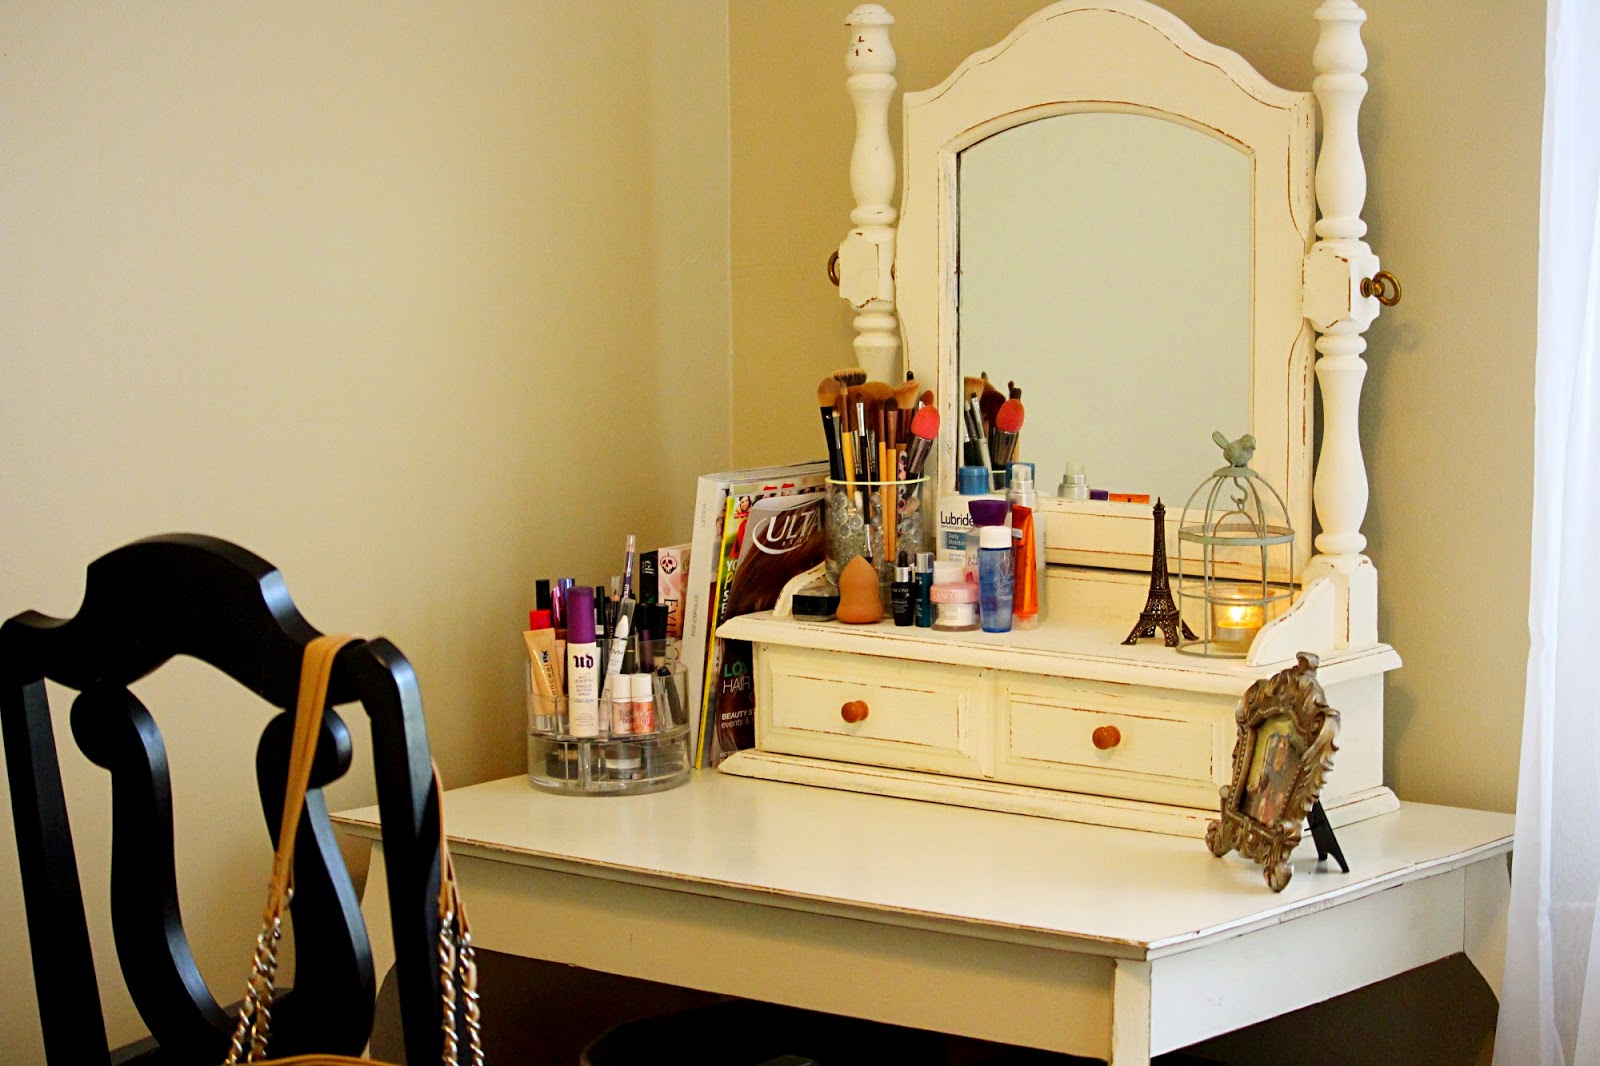
and gives great coverage. For my problem areas I am using the “Urban Decay 24/7
concealer pencil” in the shade “NSA” as you can see in the picture it’s
definitely has been well loved. I just apply this on any problem spots and on
my acne scars.


Foundation: For foundation I am still using the “Tarte
Amazonian clay full coverage foundation” in the shade “Medium Sand”. Depending
on the day I either use my brushes for concealer and foundation. If I am in a
barely any makeup on rush I’ll just blend everything in with my fingers. You
can use whatever you love and works best for you, when blending in my under eye
concealer I personally just like using my ring fingers and bending it in. for
my problem spots I will either grab my “Eco tools pointed concealer brush” or
sometimes my “Bare minerals concealer brush” if you don’t have any kind of
concealer brush the “Eco tools “are really nice brushes you can find at any
drug store or Wal-Mart. Once you are all concealed move onto your favorite
foundation. Take your favorite brush and blend it evenly including your neck! I
have been using my “Lancôme foundation brush 2” Some people don’t like flat
foundation brushes because if you don’t blend well it can leave streaking. So
if you prefer blending sponge I love the “Ulta” brand blending sponge because
it works so well and it’s cheap!

Setting powder: After your foundation is dry you want to set
it with powder. I am almost out of my “Lancôme Dual finish” shade “matte wheat
II” seating powder so I just purchased the “L’Oreal Paris true match
super-blendable powder” shade “W5 Sand beige” I just blend this all over with
the large “Bare Minerals flawless face brush”
Blush/Bronzer: As you can see in the picture my bronzer is
well loved! It is the “Revlon” shade “012 Bronzilla/Bronzette bronzer". This is
a matte bronzer; I use it to contour the hollows of my cheeks with the “Eco
tools angled brush”. On my cheeks I am wearing “Physicians formula sexy booster
sexy glow blush” in the shade “Natural” this blush has some shimmer in it so it
is a nice pop of color without over doing it. I just blend it in on the apples
of my cheeks with the smaller “Bare Minerals flawless face brush” and just a
side note if you are wondering why there are tiny holes on the brush handle my
little pup Gracie though it would make a fun toy.


Eye
brows: for eye brows I will be using the “Too Faced brow envy brow shaping and
defining kit” this is a great kit for beginners or for people who have been
doing their eye brows for years. This little kit includes so much, your eye
brow colors, blonde or brunette, setting wax, highlighter, your tools brow
pencil and eye brow stencils for shaping. I just fill in the natural shape of
my eye brows and set them. I am planning on doing an eye brow focused post in
the near future!
Eye Shadow: Eye
shadows could easily be an addiction, I love color! Every single color gives
you countless opportunities for every kind of look. But for every day I love
your basic nudes. I have been using “The Nudes” eye shadow palette by
“Maybelline” the palette has half shimmer and half mattes so you can play around
with a lot of looks. After I have primed my eyes with the “E.L.F eye primer” I
use the “Eco Tools eye shadow brush” and apply all over my eyes with the light
nude color. After I use the shimmer gold shadow and blend that out with the
“Eco Tools smudge brush” I am also using this brush for my creases. The color I
use for my creases is the chocolate matte brown; you just blend this all out
for a nice even look. For highlighting my inner tear ducks and brow bone I used
the white shimmer with the “Eco Tools detailed liner brush”.


Mascara: After your eye shadow is applied curl your eye
lashes, I am using the “Revlon eye lash curler” and using a combination of
“Voluminous Miss Manga” mascara by “L’Oreal Paris” in the color “Blackest
black” and the “Telescopic Carbon black” by “L’Oreal Paris” as well and the
color is “Carbon black” these two mascaras make an incredible pair for thick
and long lashes!
Lips: For lips I have been obsessing over “eos lip balm” in
the flavor “Mint” it is so refreshing and smells so yummy! And for a little pop
of color I have been wearing “Kate” by “Rimmel London” in the shade “103” it’s
a gorgeous color and great for a everyday look or even a night out.
Setting spray: To top it all off I set my make with “Urban
Decays all nighter makeup setting spray” a few pumps of this spray is enough, let it dry and you are ready for your day!
Nails: If you are wondering what nail polish I am wearing in
these pictures “Plastic Flamingo” is on every nail by “Spoiled” and “Sparked by
“Wet N Wild, Wild shine” on my ring fingers.
Hope you enjoy this easy every day look!
.JPG)